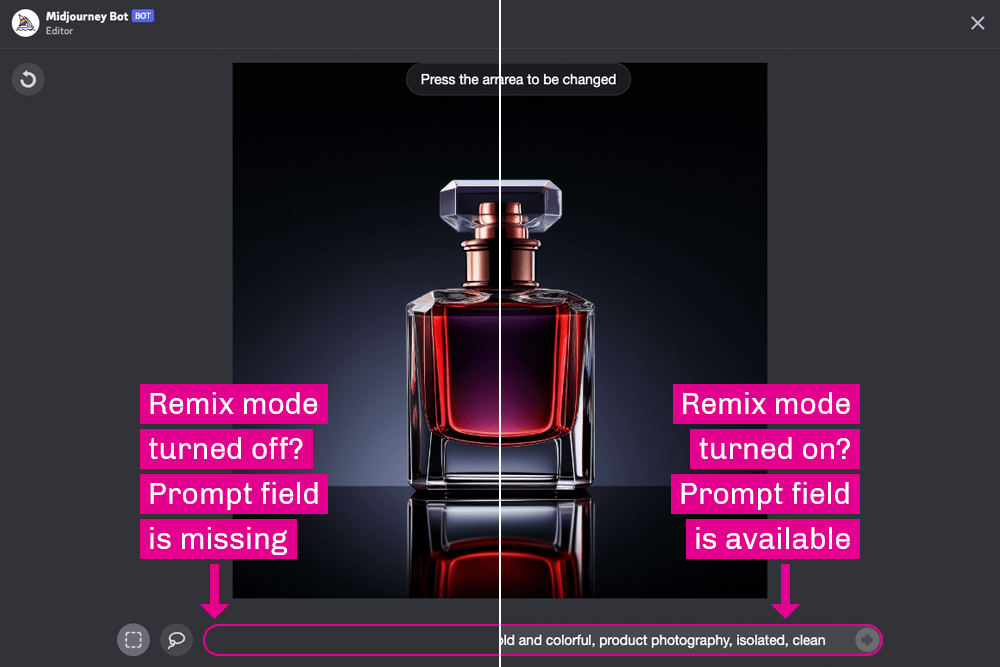
There are many tutorials on how to use Midjourney‘s new inpainting feature, but I had to dig a little bit to find out how to turn it on to make it effective. I was not obvious to me. Also, to be fair, inpainting is technically active when you load the application, but it’s not as functional without this particular series of actions.
How to Turn Midjourney Inpainting On for Effective Editing
It took me a while to figure this one out, but the answer is so simple. First, you need to have Remix mode turned on. If it’s not on, inpainting becomes a less worthwhile feature. So, how do we turn Midjourney inpainting on via remix mode? We change the settings.
How to Open Midjourney Settings
I assume you are already signed in to Discord via a desktop app or browser. Also, I assume you have access to the Midjourney server. It should (fingers crossed) work the same way in both, but I use Discord desktop app on a Mac.
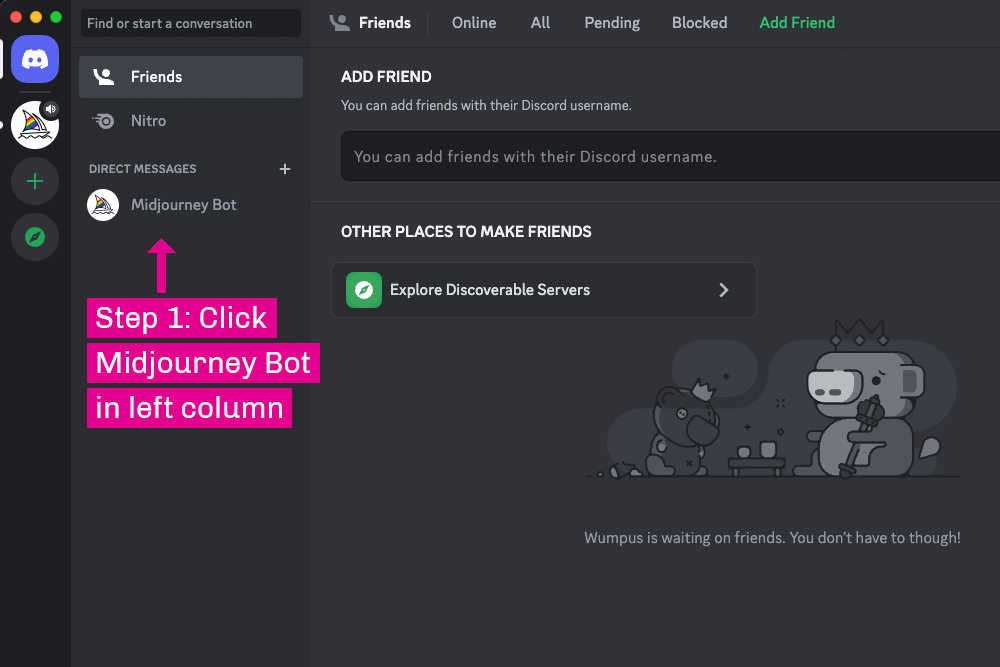
Step 1: Midjourney Bot Prompt Field
When Discord initially loads, click the Midjourney Bot link in the left column. It will open a prompt field at the bottom of your screen.
Step 2: Midjourney Bot Prompt Field
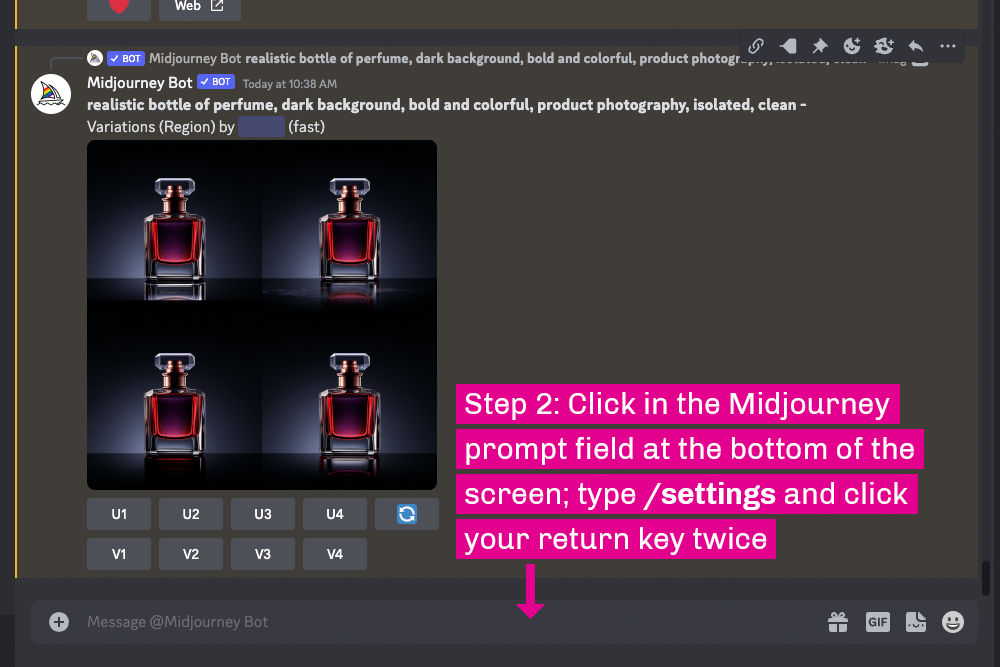
Next, click in the prompt area at the bottom of the screen, which appears like a text field for those who haven’t used it before. Enter the text /settings, click your Return key once to enter the command, and click the Return key a second time to enter the prompt. Note that you will not type anything into the prompt area to bring up your settings. But it’s important to click Return twice in order to make the settings appear.
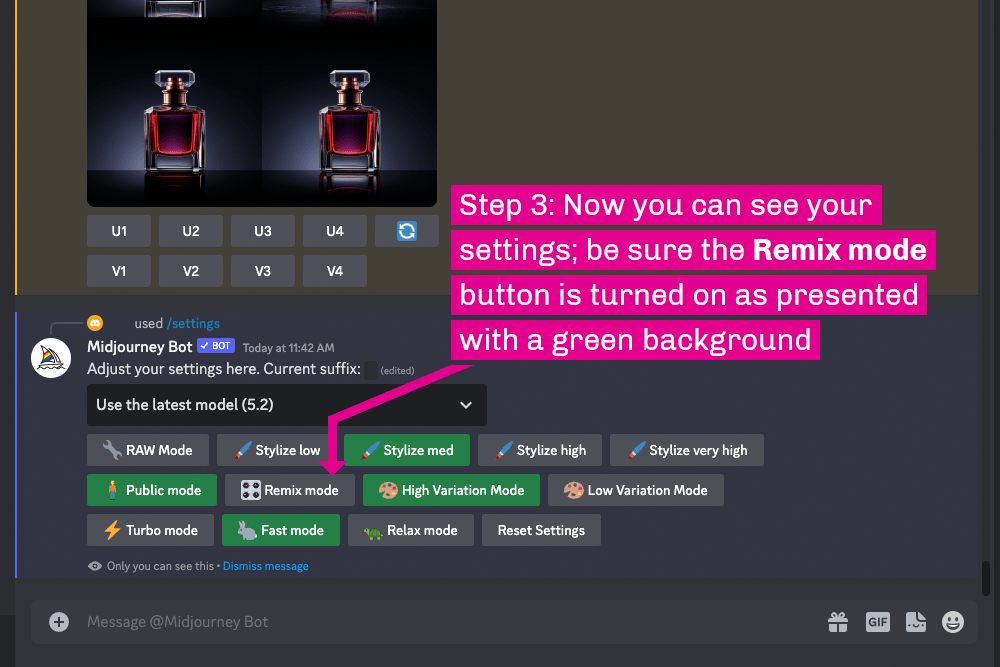
Step 3: Settings
After clicking Return the second time, you should see your settings. If the Remix mode button is off (gray background), click it to turn it on (green background). You don’t have to click anything else regarding Remix mode.
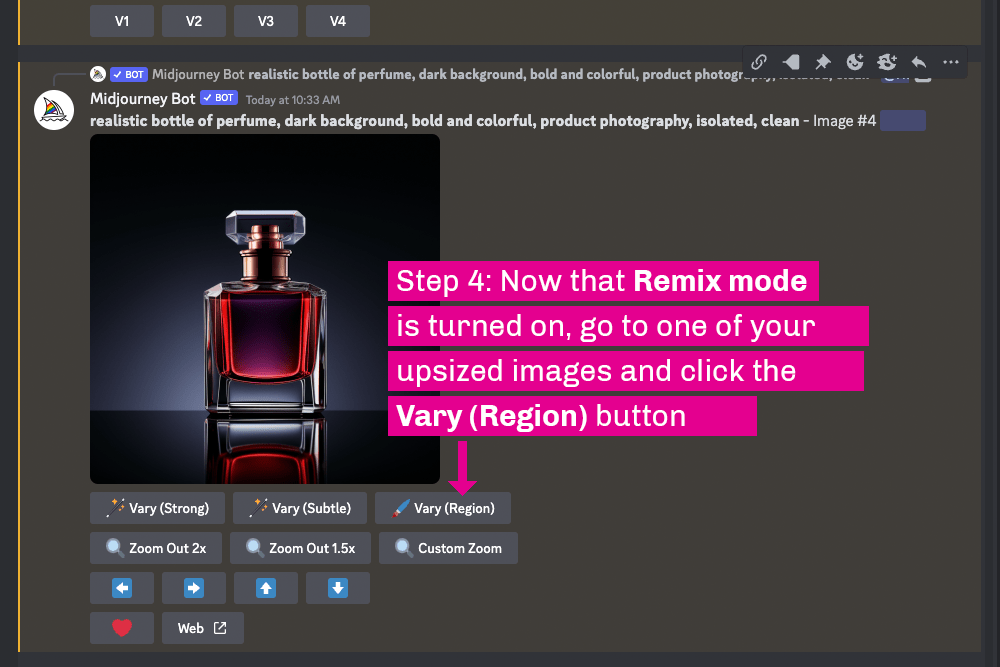
Step 4: View Upsized Image and Click Vary (Region) Button
Now you can go back to any of your upsized images to begin the inpainting process or create new ones using the /imagine command in the prompt at the bottom of the screen. Under all of your upsized image you will see options for that image. Click the Vary (Region) button to open an editor layer.
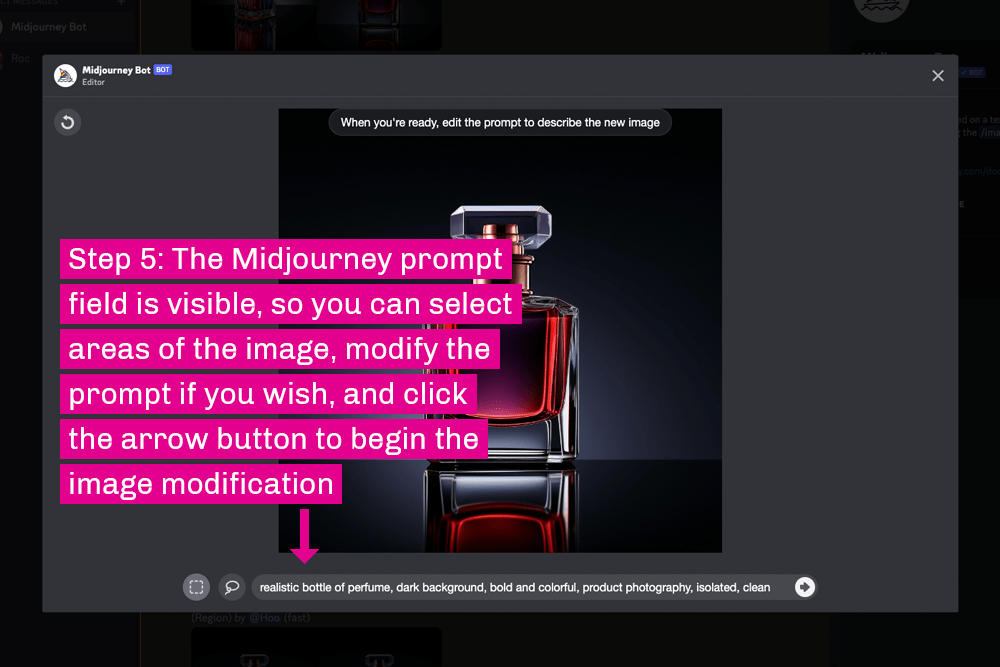
Step 5: Midjourney Prompt is Available in Inpainting Editor
When you click the Vary (Region) button, a layer opens. It includes your image, two select options (rectangle and lasso), a prompt field, and a submit button. Now you can select one or more areas of your image, change the prompt (or leave it as-is), and submit the information to revise the selected area/s of your image. Midjourney will create new images based on your selections and prompt changes, if there are any.
Conclusion of How to Turn Midjourney Inpainting On
This post explained how to turn Midjourney inpainting on. It’s great in that it’s a very easy process. However, it’s not obvious to many people how to do it. We hope this is informative.
Contact the Author
Please feel free to contact me. If you have a useful question or comment, I’ll add it here with my thoughts as appropriate, though I will never post your name or email address.
Bill Adams
[email protected]
If you would like to speak to someone at Streamline about a project, please contact us any time.
